How-To Guide: Gel Wraps
How to Prep Nails
How to Apply
How to Apply Semi-Cured Gel Wraps: Method #1
You may refer to this video for visual reference, or refer to the steps below:
1. There are 10 different sizes that will fit all nails. To determine which strip to use, place your nail under the wraps. Pick the one that fits your nail width from end-to-end.

2. Peel off the clear protective film, then peel off the gel strip.

3. Center the gel strip on your nail and paste on gently. Avoid sticking it on your skin or cuticles.


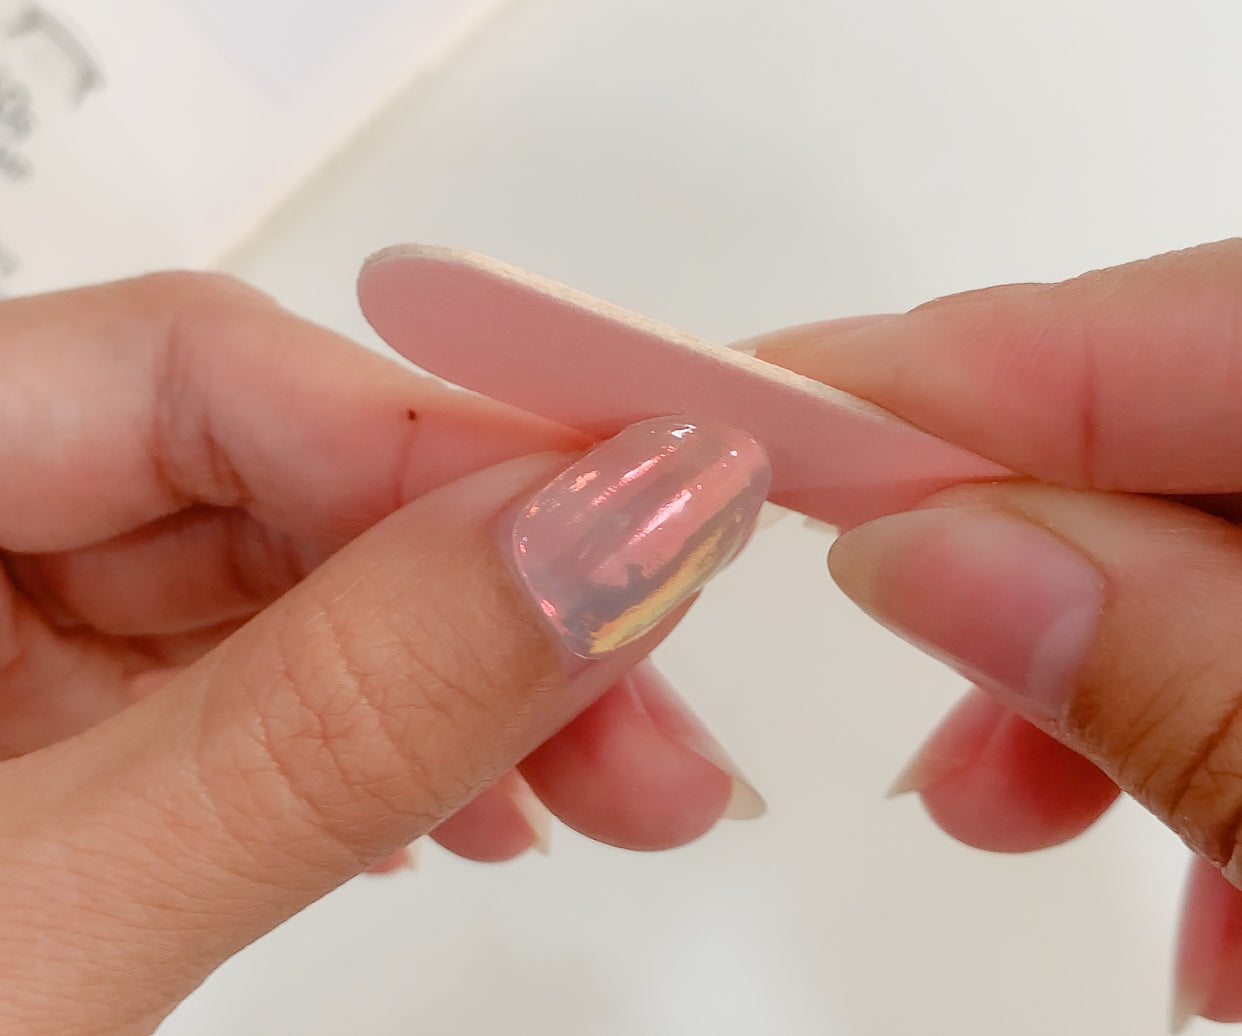
5. Gently wrap the excess gel strip around the nail tip until you can clearly see the edge you'll be filing off. Be careful not to rub/pull too much when wrapping as it might cause the top layer of the gel strip to shift.

6. File in firm, short strokes from the corners to the centre to remove the excess gel wrap.

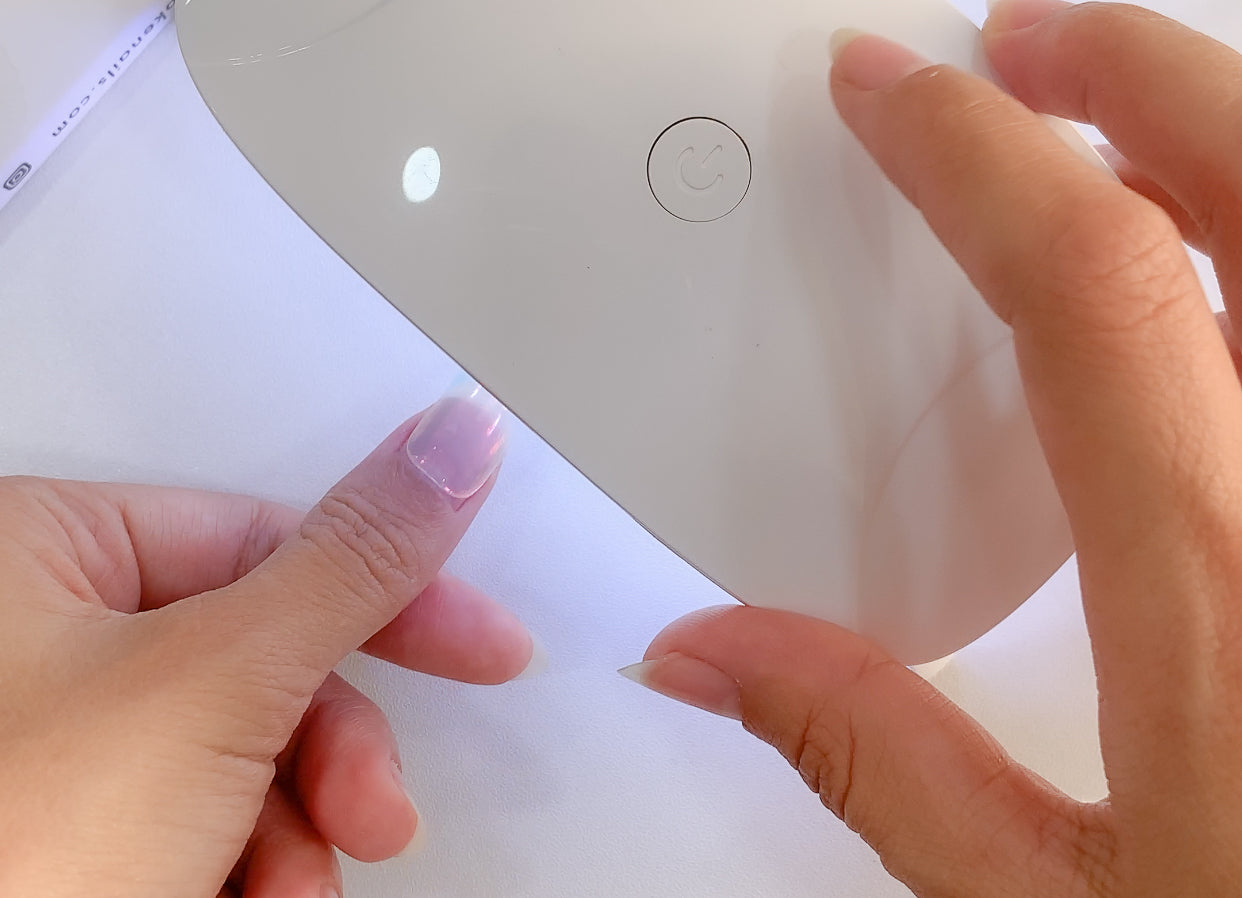
7. Cure the gel wraps under a UV lamp for 60 seconds so it can harden.

8. Use a nail file to file off any jagged edges, and to shape the gel wraps.

9. (Optional) Apply a layer of our Peel-Off Gel Top Coat, making sure to apply on the nail tip. Cure under the UV lamp for 60-90 seconds until dry to touch.
How to Apply Semi-Cured Gel Wraps: Method #2
You may refer to this video for visual reference, or refer to the steps below:
1. There are 10 different sizes that will fit all nails. To determine which strip to use, place your nail under the wraps. Pick the one that fits your nail width from end-to-end.
2. Peel off the clear protective film, then peel off the gel wrap.
3. Center the gel strip on your nail and paste on gently. Avoid sticking it on your skin or cuticles.
5. Cure the gel wraps under a UV lamp for 60 seconds so it can harden.

6. Use a nail clipper to clip off most of the excess gel wrap. Clip as close to your nail as possible, but don't worry if it isn't shaped perfectly! You can continue to shape nails in the next step.

7. Use a nail file to file off any excess gel wrap, and to shape the gel wraps.
8. (Optional) Apply a layer of our Peel-Off Gel Top Coat, making sure to apply on the nail tip. Cure under the UV lamp for 60-90 seconds until dry to touch.
Gel Top Coat Application
Sealing your nail wraps with a top coat is optional, but many have extended their wear-time up to 4 weeks with just this extra step!
We highly recommend using our Peel-Off Gel Top Coat that's specially formulated for nail wraps. For best application, follow these steps:
1. Make sure there isn't an excessive amount of gel at the tip of the brush.
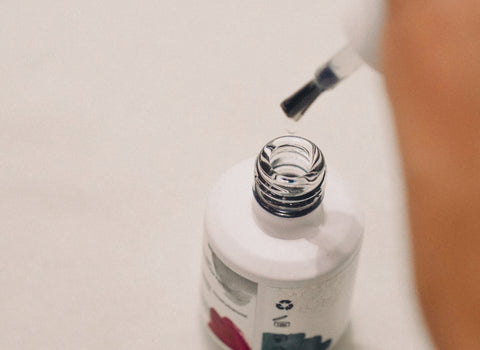
2. Apply a thin and even layer of Gel Top Coat over the nail wraps. Make sure to apply on the nail tip as it wears out easiest.


Pro Tips
#1: The 10 different nail wrap sizes are made to fit all nails. If you're in between sizes, pick the size that's slightly smaller and gently stretch it to fit.
#2: File at an angle under the nail, instead of above it, to get a seamless finish.
Find more tips & tricks here.
How to Remove

How to Remove with Pretty Easy! 2-In-1 Remover Serum
*Please do not peel the gel nail wraps off to prevent damaging your nails
You may refer to this video for visual reference, or refer to the steps below:
1. Apply a few drops of remover serum with the dropper applicator around the edges of the gel wrap. Wait for a few minutes for the adhesive to soften.

2. Use the wooden cuticle stick to gently loosen and lift at the edges.

3. Apply more drops in the gaps between the gel wrap and the nail. Wait for a few minutes and loosen further with the cuticle stick. Repeat the process until the adhesive is fully loosened and the gel wrap comes off easily.

Note: Do not forcefully lift off the gel wrap. The remover serum will help to loosen the gel after a few minutes and it should come off very easily.
How to Remove with Nail Polish Remover
*Please do not peel the gel nail wraps off to prevent damaging your nails
You may refer to this video for visual reference, or refer to the steps below:
1. Wet a wooden cuticle stick with nail polish remover then start to loosen the edges of your gel wrap.
2. Repeat until the adhesive has loosened and the gel wrap is able to come off with ease.
3. Clean nails and apply cuticle oil for nail after care!